
5 Killer Poses To Slay Your Boudoir Shoot
Posing people correctly is one of the most important skills you need to develop as a boudoir photographer.
Correct posing will not only allow you to improve the composition of your images but most importantly help you enhance/create a strong portfolio that will attract more clients.
Contrary to common belief, correct posing is not determined by a person’s body type. There are no poses “designed” specifically for how much a person weight, I find it strange when people ask me how I pose “curvy” women, I always treat everybody the same way regardless of their body type. My main focus is to use light and body language in a way that enhance women’s natural curves and deliver the right amount of sexiness. The only constrain I find is with how flexible people are, as some poses might be more demanding than others in that respect.
If you want to make captivating boudoir images keep in mind that a key ingredient of posing is the creation of movement to create dynamism. You can achieve this by incorporating diagonals, triangles, and curves in your images. You will find these elements appear regularly in my work.
However, finding something that works can be extremely time-consuming. Over the course of several years of photographing women I have curated over a hundred different poses I frequently use during my shoots, in this article, I’d like to share my five favorite poses that hopefully might help you add some variety to your shoots.
1. The Upside-down
This is one of the poses I use at the beginning of my shots, not only because it’s super easy to do but because it relaxes my clients and makes them feel more comfortable (remember that the more comfortable they are the better their images will turn out). I ask my clients to lay on their backs and to position their heads at the edge of the mattress so that it slightly drops out of the bed at an angle. This is also a very flattering pose, everybody looks great upside-down, it’s been proven by science our brain overlooks imperfections when we look at faces this way, so if you want to look more attractive this is an effective way to accomplish that ;)

I also ask them to bring their knees up and put them together so they form a triangle with their hips. Arms and hand placement is important, I have them touch their stomach or play with their hair with one hand and gently touch their face or neck with the other one. I am not a fan of people looking at my lens, I like to convey specific emotions with my images, and having their eyes closed works a lot better with what I want to communicate.
2. The Superman
For this pose I place my clients perpendicular to the light source because it works better to create contrast and highlights, I also like to mess up the bedsheets to add texture and volume so the image looks a lot more interesting.
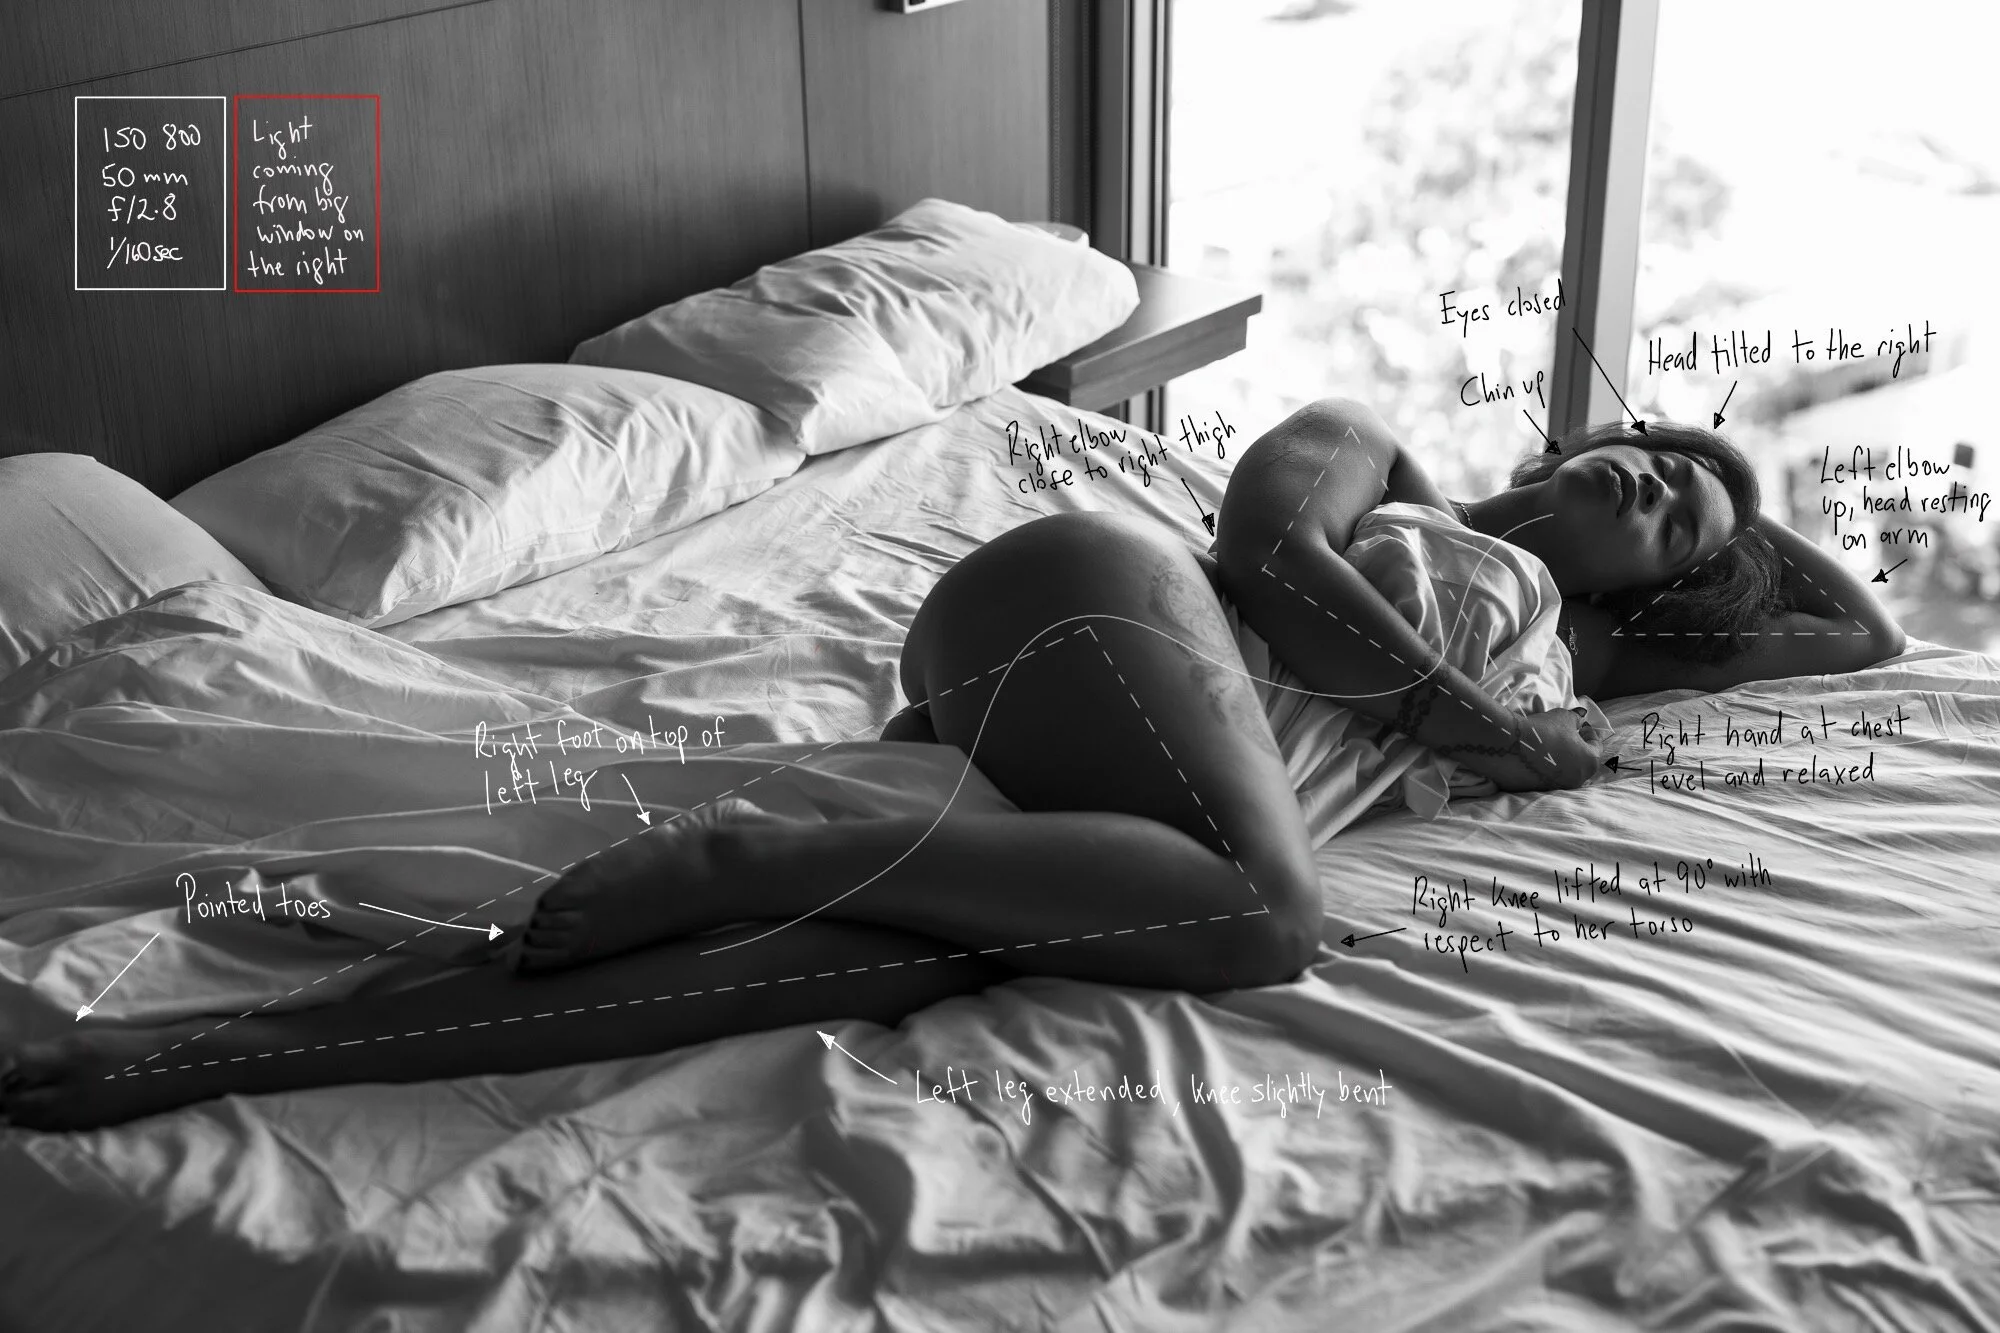
I ask my clients to bend their legs and arms in a such a way that they form triangles and diagonals to improve the composition. It is very important to have them point their toes at all times, this will improve the posture overall and make their bodies look longer. This is also a great pose for people concerned with their midsection, you can use their arms and bedsheets to conceal it. Head tilted and chin up toward the light source will shape their face very nicely.
3. The Arch
Absolutely everyone looks amazing in this pose, it really makes the hips pop and creates beautiful curves along the body. The secret is the arch on the back, so my recommendation is to direct your client to rest their upper body on the couch with their heads down and to stretch their arms in front of them as much as they can, by doing this the arch on their back will happen more naturally and with less discomfort.
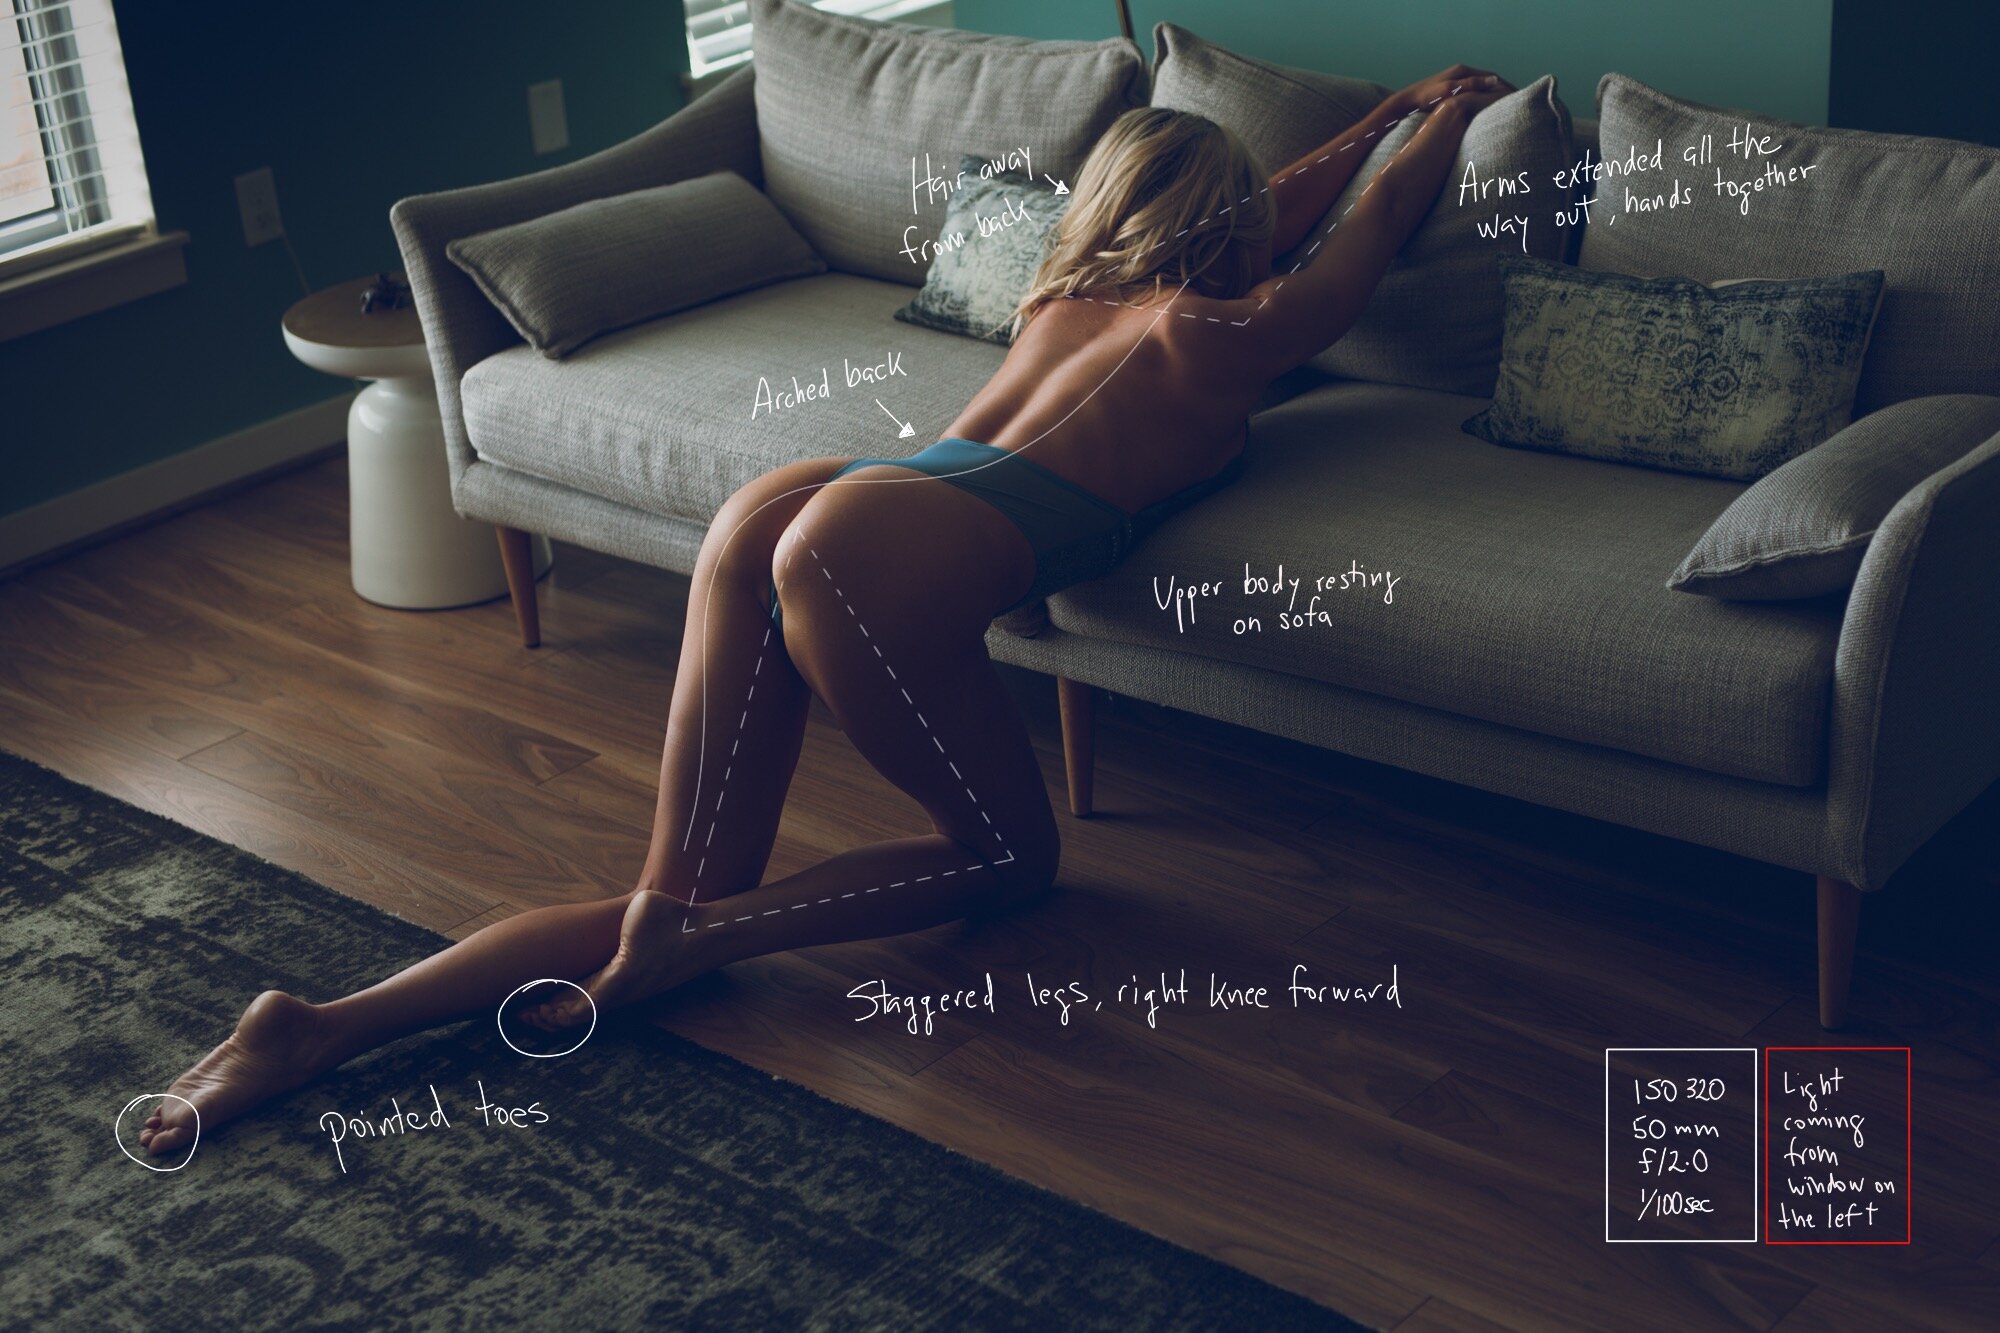
To complete the pose it’s important to make them stagger their legs and point their toes, bring one knee in front of the other (you can switch between legs to see what looks better for you). Don’t forget to expose for the highlights, the contrast between light and shadows is what gives your images dimension and depth
4. The Dip
This one here is one of my favorite poses because of the beautiful lines it creates. I normally ask my clients to lay on the bed, on their backs with their legs hanging outside the bed, I then ask them to slowly drag their body out of the bed, dipping their hips against the edge of the bed until the point where their knees are slightly above their hips. I then ask them to arch their back (the edge of the bed will help to enhance these lines), put their hands together, and stretch their arms over their heads as much as they can.
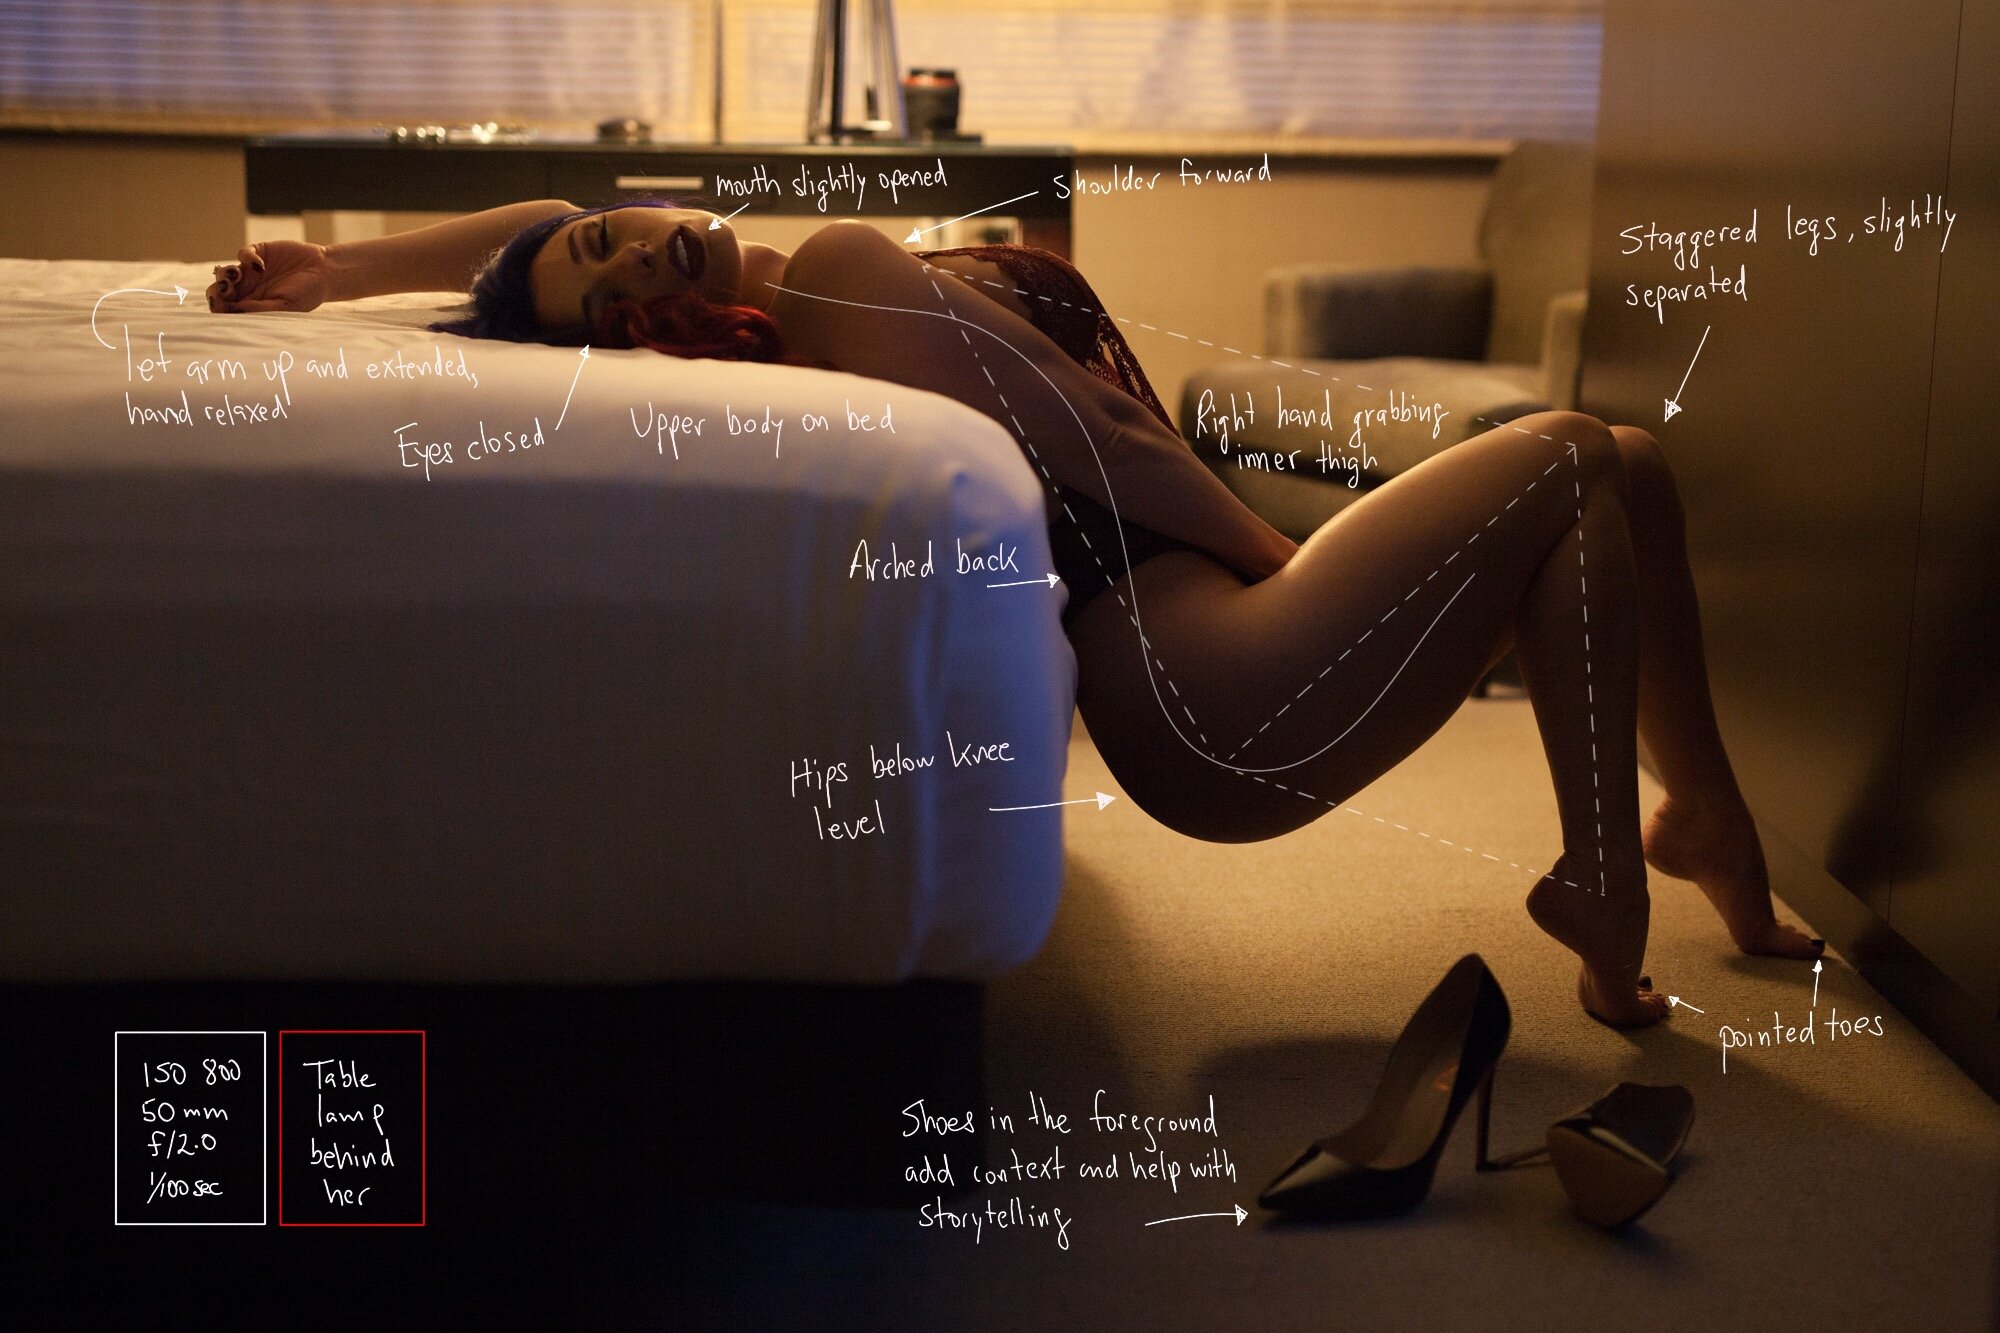
This pose might be challenging for some people as some are more flexible than others so if they feel discomfort stretching their arms this way, ask them to bring their hands between their legs.
Position yourself on her side at eye level and make sure you capture the whole length of her body. You can get another great shot by changing the angle, move around and position yourself above the top of her head, her face now becomes the center of attention with her knees/legs in the background. Don’t forget to ask them to point her toes, close their eyes and open their mouth just a little to add that extra oomph!
5. The Flashdance
I love to use highlights to grab your attention and enhance woman’s natural curves. The attention in this case is directed to her shoulders, collar bones and chest area where you see quite a lot of volume created by the contrast between light and shadows on her skin. To accomplish this effect it’s important to place your client on her elbows, they must be right below her shoulders and close to her body (not away), also important is for your client to relax her neck and let her head drop in between her shoulders.
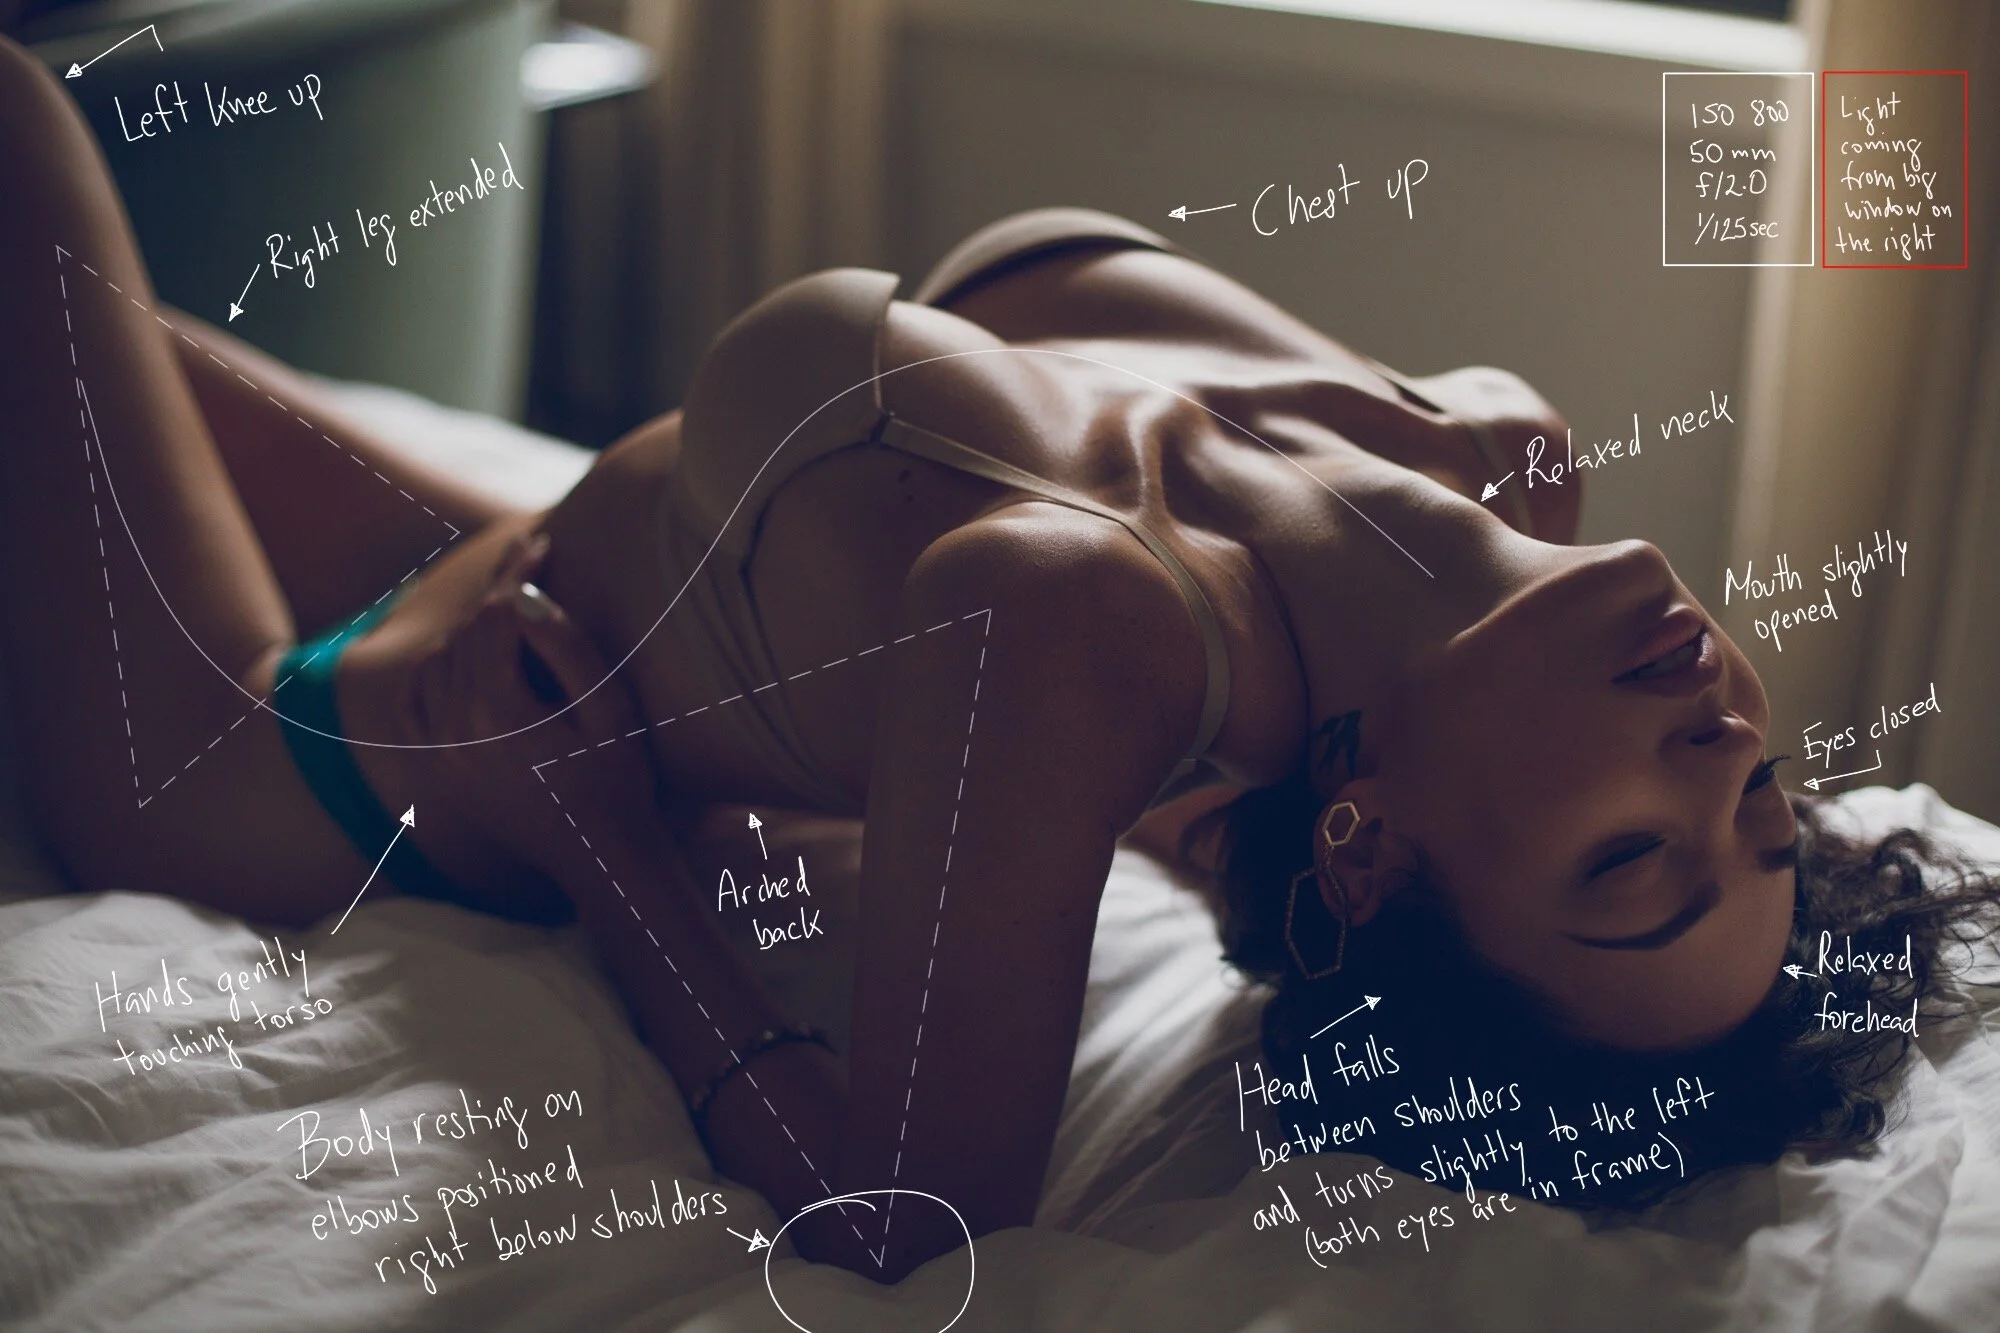
An arched back will help her accomplish the correct placement of her head while at the same time will bring her chest up.
Please don’t overlook the position of her legs! The knee closer to the light source should be lowered to create a nice triangle with her hips, also remember to make her point her toes at all times. This pose is definitely a winner!
I hope you guys found this information helpful, I use these poses regularly in my shoots. For those of you interested in learning more I have created a posing guide with more than a hundred poses (standing, sitting, on the floor, etc..) including my camera settings, light source and very detail instructions on how to pose your clients. This guide is helping lots of boudoir photographers create a killer portfolio and increase their sales. If you want to learn more please follow this link
If you are interested in a boudoir shoot please fill the form below and I will contact you shortly: